Showing posts with label Bouldering. Show all posts
Monday, April 26, 2010
The Gravity Vault - Upper Saddle River, NJ
I wandered into New Jersey to meet a friend for Lunch and decided to get some climbing afterward.
I visited during the day and the place was pretty empty. The staff told me it can get pretty busy during the after work hours. There is ample floor space in the gym so I doubt you'll feel too crowded.
The bouldering wall is split in to two areas. One of the walls can be topped out although many routes don'r seem to be set up with a top out in mind. The gym has a decent bouldering area but the real fun seems to be on the ropes. The roped wall seemed to have a good variety of climbable surface.
There are also few exercise machines and a lounge area.
Over all the gym was well maintained and the climbs were o.k. I wouldn't go out of my way for the gym but if you are in the area it's not a bad gym.
View Larger Map
Gunks - Bouldering
Location:
Shawangunks, also known simply as the "Gunks" is located 2 hrs north of NYC near New Paltz, NY. The following map shows the parking lot to access the Gunks.
View Larger Map
Access:
To climb at the Gunks you need to pay the daily usage fee of $15 for climbing. If you will be visiting the Gunks often you can purchase a season pass for $85.
Approach:
There are handful of bouldering areas but majority of the problems are located in Trapps bouldering area. To access the Trapps bouldering Area after you park your car hike up the fairly well maintained on dirt and stone steps trail till you reach the carriage way. Once you get to the carriage road approach to many problems should be very easy. The whole approach can be done in flip flops but some might prefer to have better shoes for the initial hike.
Guidebooks:
According to the guys at Rock and Snow the best guide book for bouldering in the area is "Bouldering in the Shawangunks". If you have a hard time finding the guide book you can just go to Rock and Snow in new paltz on your way and pick up a copy.
View Larger Map
Where to Stay:
I made the Gunks a day trip from NYC. For much more detailed information on where to stay check out Mountain Project. The Mountain Project website has a very comprehensive list on everything you need to know about climbing at the Gunks.
Bacchus is an excellent place for dinner. The food is pretty good and the beer selection is pretty awesome.
View Larger Map
Wi-Fi:
There should be plenty of cafe's with wi-fi access in New Paltz.
Links:
mountainproject.com
rockclimbing.com
The Virgin's Guide To Gunks Climbing
Shawangunks, also known simply as the "Gunks" is located 2 hrs north of NYC near New Paltz, NY. The following map shows the parking lot to access the Gunks.
View Larger Map
Access:
To climb at the Gunks you need to pay the daily usage fee of $15 for climbing. If you will be visiting the Gunks often you can purchase a season pass for $85.
Boxcar Boulder
Approach:
There are handful of bouldering areas but majority of the problems are located in Trapps bouldering area. To access the Trapps bouldering Area after you park your car hike up the fairly well maintained on dirt and stone steps trail till you reach the carriage way. Once you get to the carriage road approach to many problems should be very easy. The whole approach can be done in flip flops but some might prefer to have better shoes for the initial hike.
Guidebooks:
According to the guys at Rock and Snow the best guide book for bouldering in the area is "Bouldering in the Shawangunks". If you have a hard time finding the guide book you can just go to Rock and Snow in new paltz on your way and pick up a copy.
View Larger Map
Where to Stay:
I made the Gunks a day trip from NYC. For much more detailed information on where to stay check out Mountain Project. The Mountain Project website has a very comprehensive list on everything you need to know about climbing at the Gunks.
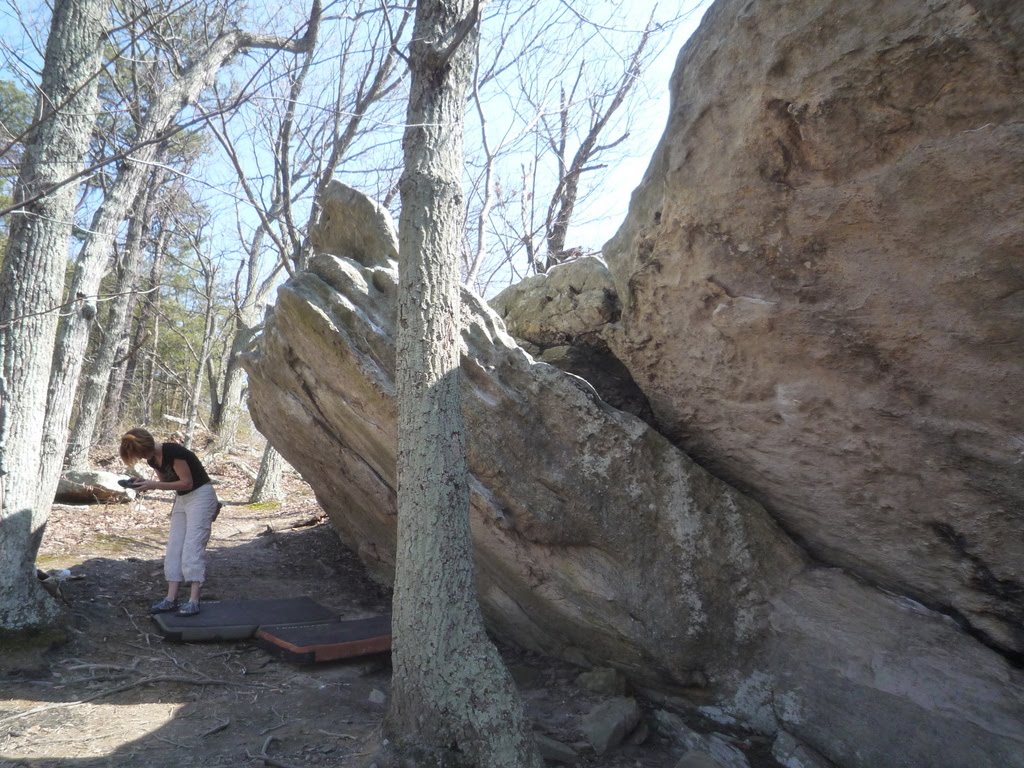
The crash pad welcome mat at Andrew Boulder Problem
Food:Bacchus is an excellent place for dinner. The food is pretty good and the beer selection is pretty awesome.
View Larger Map
Wi-Fi:
There should be plenty of cafe's with wi-fi access in New Paltz.
Links:
mountainproject.com
rockclimbing.com
The Virgin's Guide To Gunks Climbing
Labels:
Bouldering,
Crag Beta,
Guide Books,
Gunks,
New York,
Shawangunks
Saturday, April 17, 2010
Brooklyn Boulders - NYC
For a big city there are surprisingly few indoor climbing options. There are some normal gyms with climbing walls but there is only one real climbing gym.
I was there during the middle of the day so it was pretty quite but I've been told it gets really crowded and busy after the work day is over.
Brooklyn Boulders
Brooklyn boulders is the only true climbing gym in NYC. BB is a fairly new gym that is still under construction. I came unfortunately on a day that more than half the bouldering areas were not accessible. The routes on the steeper wall were being replaced while the padded floor on the main bouldering walls were being repaired.Routes being replaced
Fortunately when I told one of the guys working there about my cross country travels he decided to give me a free day pass and even gave me a quick tour of the gym that is still under construction. The part that is still under construction looks very promising.Once complete it should provide almost double the climbing surface. Slack line!
Besides the standard sport, lead and bouldering walls there is a slack line, gymnastic rings and campus boards. They also have a water fountain! No need to buy over priced waters at the front desk.I was there during the middle of the day so it was pretty quite but I've been told it gets really crowded and busy after the work day is over.
The rope climbs on the left, the bouldering on the right.
The vibe is fun and the climbs are interesting. If you are in NYC and don't have time to hit the Gunks definitely get your climbing fix at the Brooklyn Boulders.Entrance to the fun!
Tuesday, April 6, 2010
McAfee's Knob - Crag Beta!
Mickey Mouse Boulder
Location:McAfee's Knob is located approximately 20 minutes north west of Roanoke VA. Here is the turn by turn directions from Mountain Project.com
"From I-81 take exit for Rt. 311 just south of Roanoke. Follow 311 S and park at the top of Catawba mountain, where the AT crosses the road. There is a large gravel lot on the left."
The parking lot on the left
View Larger Map
Access:
There is currently no access issue.
Snow!
Approach: Just park your car in the parking lot, start heading down the hill to the left until you see a gated fire road. The Roadside Boulder should be visible on top of the hill and if you keep heading down the fire road it should lead you to the rest of the problems. Since most of the problems can only be accessed after 3.5 miles of hiking so comfortable shoes are recommended.
Guidebooks:
To my knowledge the only guide book available for the area is the Dr. Topo guide. The guide is still accessible from Dr. Topo's website. -link-
Where to Stay:
I stayed at a friend's place in Roanoke but if you are looking for camping options according to rockclimbing.com:
"There is camping on the main trail on the way up there. Camping at the very top is prohibited. Otherwise camping is allowed anywhere on the Appalacian Trail."
Food:
There are many food options in Roanoke. If you are craving a biscuit or two Tudor's Biscuit World is the place to go.
Wi-Fi:
There are many cafe's in Roanoke that have wi-fi access. Tudor's Biscuit World also has wi-fi access.
Links:
drtopo.com
rockclimbing.com
mountainproject.com
Monday, April 5, 2010
McAfee's Knob - Bouldering!
My back was still not 100% but we still decided to finally get some more bouldering in. We decided to go to a spot near Roanoke VA called McAfee's Knob.
Jennifer worked the climb right below the left ear of Mickey Mouse called the Tornado V1. After some tries she got it! And it's definitely not an easy V1!
After the Tornado we started running out of time but there was one more climb I really wanted to do. I have been eying it ever since we got to the MM boulders, a V3 dyno called the Flake Dyno. A dyno is probably not the best thing for a injured back but I couldn't resist.
Jennifer getting ready for a climb!
We started our day at the Roadside Boulder which has a very short approach. The rock is visible from the road! Jennifer on Flake Problem V0
Since it was Jennifer's first time bouldering outdoors and since my back was still not 100% we decided to hop on Flake Problem V0. I flashed the problem but I found it to be a pretty stiff V0 with the sit start. The crux is the sit down start and the top out. I also climbed Roadside Arete V2. The trick to the climb is to keep both hands on the right and move your right hand further to the right for better holds. There were many other climbs that looked like fun but I decided that it was probably better to play it safe rather than risk messing my back up any more.
I think that this photo is of me on the same problem...
The next cluster of problems was located 1 mile up the road. The boulder was called Mickey Mouse Boulder and once you see it you'll know why it's named Mickey Mouse Boulders. Flashing the Mickey Mouse Left V3 on the Mickey Mouse Boulder.
The boulder really does look like Mickey Mouse! Needless to say I was all giddy when I saw the rock. Both the Mickey Mouse Right V2 and Mickey Mouse Left was a lot of fun even if the Mickey Mouse left's top out was a bit scary. Jennifer worked the climb right below the left ear of Mickey Mouse called the Tornado V1. After some tries she got it! And it's definitely not an easy V1!
After the Tornado we started running out of time but there was one more climb I really wanted to do. I have been eying it ever since we got to the MM boulders, a V3 dyno called the Flake Dyno. A dyno is probably not the best thing for a injured back but I couldn't resist.
Look ma! No feets!
The climb was the perfect Dyno. Very solid starting hand hold, decent foot holds and a reachy and fairly decent hand hold to latch onto. Since Dynoing is not my strong suit it took me a while before I was utilizing my body well enough to really launch for it. I pushed hard with my legs, pulled my body close to the rock and let the feet cut loose. It took me many tries but I got it! What an awesome way to end a bouldering day!
Thursday, March 25, 2010
LRC Doh!
After the awesome day of climbing I was super psyched on climbing again at LRC! We decided to warm up near the Mystery Machine Boulders.
For my first climb of the day I decided to climb a slightly tall problem called the Incredarete V0. I thought this would be a fun easy warm up.
The starting moves seemed a bit tricky but I got through them and kept on going up. Towards the top I was planning on moving to the right instead of staying left and that's when it happened. My foot slipped, my hand popped out and I went falling. It was so unexpected that I didn't have any time to think.
Next thing I know I missed the pad by a foot and landed on the ground on my butt with my spine straight up. I felt a shock all through my lower back.
I did have a spotter for most of the climb but he decided to move away once I got higher because he thought I was already up. I did have a crash pad but the way I fell made me miss it by a foot, and because of the way I fell my lower back took all the force of the fall...
I was in pretty bad pain and needless to say my day was shot. I could walk but it hurt to twist my body at all.
This was the first time I took a fall that bad and I grew very concerned. I decided to go to a nearby hospital to get it checked. Fortunately nothing was broken and I just needed to rest it but the whole experience gave me a fright.
We all know going into bouldering that it can be a dangerous sport but sometimes life likes to give you little reminders. I was lucky to not have bigger injuries. So what did I learn from this experience?
- Never stop spotting somebody till they are fully up and over and they can verbally confirm that they are o.k.
- It's probably a good idea to not warm up on highball problems especially as your first climb if you have never climbed it before.
- If the weather is cold make sure the rubber on your shoe is warm. When you climb with cold shoes they might not have the same amount of friction that you are used to. A good way to do this is to keep them inside your jacket to warm them up.
- Never underestimate any climb. Even if a climb is rated far below your skill level a fall from 15 feet up hurts just the same.
Wednesday, March 24, 2010
Little Rock City (a.k.a Stone Fort) - Bouldering!
Warm Up
After HP40 my finger tips were completely raw and the cold weather camping wore me down but after a few days of recovering in Chattanooga I was ready for an awesome day of climbing! The Crescent V1
Hairy Underclings V2
One climb that I thought was pretty fun was the Hairy Underclings V2. The rock formation is pretty awesome looking. The rocks have wavy bulbous slopers that have flat bottoms. The Key to the climb is to use your thumbs to catch the flat bottom portions to help keep your body close to the rock. Super Mario V4
One problem that Victor and I really wanted to hop on was Super Mario. According to the guidebook this is one of the most popular climbs at LRC and I can see why. This climb has many fun moves including a knee bar! Definitely hop on this problem if you visit LRC. Red House V7
If you complete Super Mario you might want to give Red House a go. Red House is a harder variation of Super Mario. The climb starts low on small underclings goes up to some small crimp to the left, a finger lock, to a heel hook. It is a pretty burly climb but it suited my climbing style. I got really close on my first go but had a hard time sending it. It took many tires but I eventually got it! It was a fun climb! I think it is easy for the grade but I'm not complaining though, it was my first V7!Your Sister Boulder
After Red House both Victor and I was pretty beat. Victor decided to take a break while I decided to get some easier climbs in. We headed to "Your Sister Boulder". There are 4 problems ranging from V0- to V3. I finished the Uncle Punchy V0, Drag Me Down V1 and These Feels Like Your Sister V3. Funny names and pretty fun climbs!Mystery Groove V4
For our last climb of the day we decided to try out the Mystery Groove. This was an awesomely fun climb! For the start there is a shorter person scrunched up beta which I used and there is a taller person beta that Victor used. If you are feeling too scrunched look for a foot hold further out to the left. This climb was a perfect climb to end the day since it has many fun delicate balancy moves that doesn't need to much energy. I liked the climb so much I did it twice! I highly recommend you give this climb a go! The down climb can be a bit tricky. I found that the easiest down climb route for me was on the left face of the rock using the horizontal crack. Make sure you scope it out before you head up. What an awesome day of climbing!
A photo showing that LRC is really located in a golf course.
Friday, March 12, 2010
Horse Pens 40 - Bouldering - Day 3
Either it's really cold or the water is magical...
The sun finally decided to come out but it was still pretty cold! Since we were leaving for Chattanooga later in the day so not only was this was going to be our last day but it was also a half day! Warm Up.
Kevin was taking a break letting his shoulder recover so victor and I headed out to the 10 pin boulder to warm up. As our first hard problem we tried Pop Eye V5. I got past the first few moves after much effort but was having a hard time finishing it up. I think if I worked on it I could complete it but I didn't want to get burnt out on just one problem. So we decided to move on to the next problem.
Not the coolest looking pose but I flashed it! The Low Down V4
The next problem we tackled was The Low Down. The beginning portions of the climb are pretty juggy but the top out is a bit tricky. Lot's of friction and moving your foot slowly up, typical HP top out I suppose :o) Start of Mortal Combat V4
Mortal Combat! V4
Our next big project was the scary ridiculous looking Mortal Combat V4. This is one climb that is best climbed with ample padding and at least 2 spotters. The spotter on the left is very important since they are pretty much all that prevents you from falling down a crevice. The climb is pretty tall and the landing bad if not padded right. This was a very tough climb! There is barely anything for your right hand and there isn't much for your feet either. you have to look for any slight variations in the rocks and place your foot on it. I so wanted to get the climb but after taking many falls I had to call it quits. If you are a slab climber extrodinare you'll like this climb. Lucky Charms V2
After Mortal Combat we just ended up doing some easier climbs. My time at HP40 was amazing but with my finger tips at the verge of bleeding through I was glad to be moving on to a destination that won't be so rough on my hands.
Monday, March 8, 2010
Horse Pens 40 Bouldering! - Day 2
Our second day of climbing started out a bit cold and miserable. The sun decided to never come out, our fingertips were completely raw and it was cold! It took us a bit before we finally got out motivation but once we did we were ready for a good day of climbing.
Kevin and Victory warming up
I forgot the name...
Growing Stone V2?
Groove Rider V3
As part of our slabby expedition we tackled Groove Rider first. You start climbing up the crack on the right and then make a transition to the groove when you are high enough to get your foot on the good edge. The problem is easier if you got a bit more vertical but I got in a few tries! If you want to experience some groove climbing this is a good one to work on.Earth, Wind, and Fire V4
We decided to get the "groove" going so we decided to tackle Earth, Wind and Fire. This is a HP40 classic and I would recommend people give it a go. The climb is actually not too hard but fun. As with many slab/groove problems the placement of the foot is key to move up higher. I got it on my 2nd go!Swirls V4
This was a pretty tough climb! The beginning portion of the climb is filled with slapping frictions and then you have to do a moderately hard top out. It seems like different people have problem with different portions of the problem. To me the slopey portion felt hard and the top out pretty easy but some people seem to have a much harder time with the top out. The Slag V5
This is the first V5 I did at Horse Pens 40! There are 2 different ways to complete the climb. One is method is a hard dyno and the other is a hard static crimp. Victor sent the climb by doing the dyno move but since dynoing is not my strong point so I tried the crimpy method. It is a bit balancy and you do need to crank on your right hand a bit but definitely easier than some other V4s in HP40.Excessive taping is futile!
After climbing for so many hours our hands were completely raw! Taping one finger may not hinder your friction too much but taping almost all of your fingers is not advised...
Genesis V3
The last climb of the day for me was ironically the first climb ever established in HP40. The climb is not something I would consider amazing but I really wanted to finish the climb for it's historical significance. The climb is a fairly short one with a dyno. It actually took me more tries than I thought. If you have a hard time sticking the climb you might be just hitting the wrong spot. I'm just glad I eventually got it!
Thursday, March 4, 2010
Horse Pens 40 Bouldering! - Day 01!
The temperatures were pretty darn nice for my first day of climbing at HP40. Feeling pretty good I decided to start off easy and decided to do a V0- for my first climb at HP40! The V0- I climbed was the Down Climb Groove in the Ten Pins Boulder Area.
The Down Climb Groove V0-! My first climb in HP40!
The funny thing is I did not flash this problem! LOL! The climb was not hard but it was a friction slab climb. I had to shift my mindset from looking for jugs to looking for any place where I can slap my hand on and use the friction on my hand to climb up. I think in that way this was the perfect climb to start off my HP 40 adventures. I decided to get some more warm ups and decided to go straight for the classic Bum Boy.
Vandala V1
Warm Ups
More warm ups
I can't remember any of these climbs names...
The boulder that the Bum Boy is on is probably the one of the most amazing looking rocks I have ever seen. The whole rock looks like a scaly monster! There are three problem on the most bulbous scaly side of the rock. From left to right it is Bum Boy V3, Centipede V4, and Millipede V5. Some guide books including the Dr. Topo guide list each climb as one grade higher but due to all the sand baggery HP40 is known for they have been down graded a grade.
Crazy looking rock! Bumboy V3
There are at least a handful of ways to go up Bum Boy. The hard but frictiontastic way to go up is to slap up to slopers and somehow magically sticking. :o) If you are looking for a shorter strong person beta move right, get you left hand in the inverted V shape under cling, move your right hand to a decent sloper and then step up high with your left foot and push up on your legs and go straight for the better bulby slopers with the right hand. It took me many different betas before Amanda(I think that's her name... sorry if I got it wrong!) showed me this beta. During my many attempts at Bum Boy I met Will, Liz and their great group. They even fed me! I think it's amazing how many amazingly friendly people I have met during this trip. While hanging out with Will and crew I flashed Chicks V1, Dope V2, Moms V2, Panty Shields V3, and Eight Balls V2.
Panty Shields V3
Arrow pointing at a guy on the rocks!
Lot's of fun easy problem on the Front Slabs Boulder
Will and crew decided to leave a bit early but I still had a lot of climbing left in me. The next problem I attempted was the Crown V3. For a V3 the start move is a bit burly. It's a high twist up with the left hand to a pocket. The problem I was having with the climb was actually not the beginning but was the end! I was trying the tall beta and was failing miserably. The Short man beta that I eventually figured out made the problem seem so much easier. The trick was to place the left foot below the right hand and twist up with the left hand when you are going up to the "crown". I spent a fair amount of time working the problem and this is when I met Kevin and Victor.
Kevin and Victor were on a climbing trip from Indiana. We climb together for the rest of the day and became good friends over the next few days of climbing.
Some of the more fun problems we did that day was a pocketed Hueco climb called the Wasp V2 and the funky start Uniball V3.
Huecos in HP40? Yup! Sandstone friction-y sloper huecos! Wasp V2
The starting move on Uniball V3
I'm glad that Kevin and Victor figured out the beta. Logan told me about the beta but I completely forgot about it. The way you start is with the left hand, right hand right foot match. You then move up with your left hand to an under cling. It's a super cool interesting start! It can be a bit tricky but a lot of fun. What an awesome day of climbing!
Subscribe to:
Posts (Atom)